Have you ever dreamed of recording your own music from the comfort of your home? Whether you are a singer, songwriter, rapper, guitarist, keyboard player, or independent music producer, building a home recording studio can be one of the best investments you make in your musical journey.
Thanks to modern technology, creating professional-quality recordings no longer requires access to an expensive commercial recording studio. Today, musicians can purchase affordable recording equipment, download music production software, and produce high-quality songs using a laptop or desktop computer.
A home recording studio gives you the freedom to experiment with sounds, record whenever inspiration strikes, develop your musical skills, and work on projects without paying hourly studio fees.
However, getting started can feel overwhelming. There are hundreds of microphones, audio interfaces, speakers, headphones, and recording programs available. Knowing which equipment you actually need can help you avoid unnecessary expenses.
The good news is that you do not need a massive room filled with expensive equipment to get started.
In this guide, we will explore the essential equipment needed to build a home recording studio, explain what each piece of equipment does, and provide practical advice for creating a recording environment that fits your budget.
1. A Reliable Computer: The Heart of Your Recording Studio
The first essential item for a home recording studio is a reliable computer.
Your computer serves as the central control system for your recording environment. It runs your digital audio workstation (DAW), processes audio recordings, manages virtual instruments, and stores your music projects.
Both Windows and Apple computers can work extremely well for music production.
When choosing a computer, consider the following specifications:
● Processor: A modern multicore processor helps manage demanding recording sessions and virtual instruments.
● RAM: At least 16GB is a practical starting point for many music production setups. Larger projects may benefit from 32GB or more.
● Storage: A fast solid-state drive (SSD) helps load software, samples, and recording projects.
● USB or Thunderbolt connections: These connections support audio interfaces, MIDI controllers, and external storage devices.
You do not necessarily need the most expensive computer available. A reliable machine with sufficient memory and storage can handle many home recording projects.
If you already own a reasonably modern laptop or desktop, try using it before investing in a new computer.
2. Digital Audio Workstation (DAW): Your Music Production Software
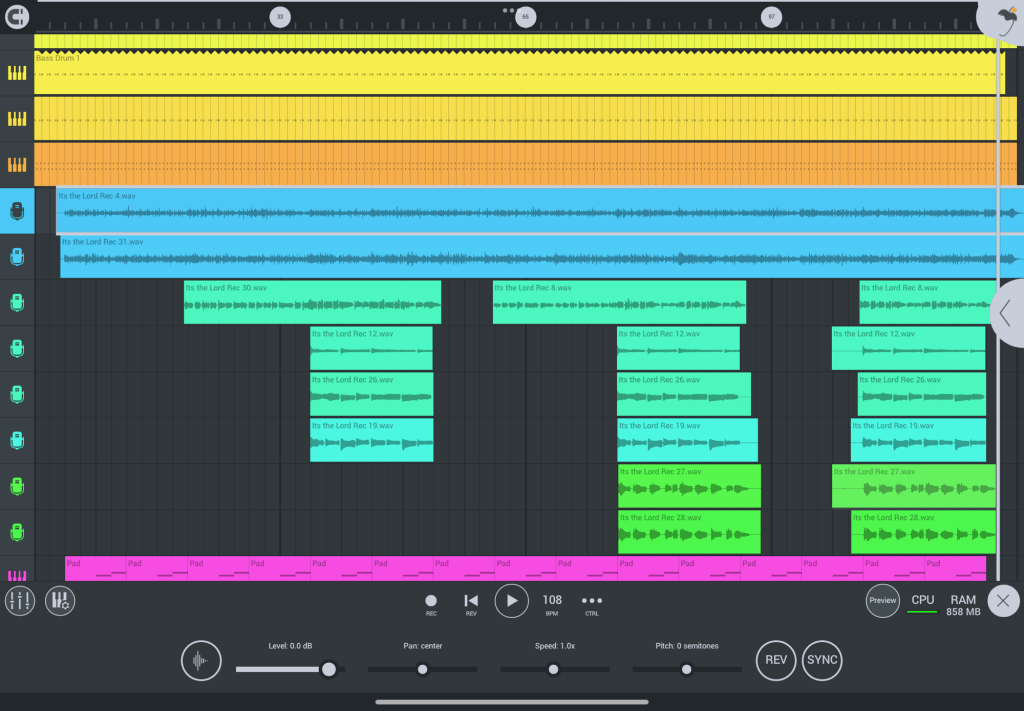
A Digital Audio Workstation, commonly called a DAW, is one of the most important parts of your home recording studio.
A DAW is software that allows you to record, edit, arrange, mix, and produce music.
It essentially turns your computer into a virtual recording studio.
Some popular music production programs include:
GarageBand: An excellent starting point for beginners using Apple devices. It includes virtual instruments, recording features, and basic mixing tools.
FL Studio: Popular among hip-hop, trap, electronic music, and beat producers. Its pattern-based workflow makes creating beats and melodies straightforward.
Ableton Live: A flexible platform for electronic music production, sound design, and live performance.
Logic Pro: A powerful production program for Mac users, offering recording, mixing, virtual instruments, and extensive creative tools.
Pro Tools: Widely used in professional recording environments and particularly useful for multitrack recording and audio editing.
REAPER: An affordable and customizable DAW suitable for recording, editing, and mixing music.
When choosing your DAW, think about the type of music you want to create. You do not need to purchase several programs immediately. Learning one DAW thoroughly is often more valuable than constantly switching between different applications.
3. Audio Interface: Connecting Your Instruments to Your Computer
An audio interface is an essential piece of recording equipment that connects microphones, guitars, keyboards, and other audio sources to your computer.
It converts incoming analog audio signals into digital information that your DAW can record.
Most audio interfaces also provide headphone outputs, monitor connections, microphone preamps, and instrument inputs.
Popular manufacturers include Focusrite, Universal Audio, PreSonus, MOTU, and Audient.
When choosing an audio interface, consider:
● The number of microphone inputs you need.
● Whether it supports condenser microphones requiring phantom power.
● Instrument inputs for electric guitars and basses.
● Headphone outputs for monitoring.
● Compatibility with your computer.
● Driver stability and audio performance.
For a beginner recording vocals or a single instrument, a two-input interface is often sufficient.
If you plan to record a full band, multiple microphones, or several instruments simultaneously, you may need an interface with more inputs.
A good audio interface can improve your recording workflow and provide the connections necessary for a professional home studio.
4. Microphones: Capturing Your Voice and Instruments
A quality microphone is one of the most important investments you can make when building a home recording studio.
Microphones capture sound and convert it into an electrical signal that your audio interface can process.
There are several microphone types, but two are especially important for home recording.
Condenser microphones
Condenser microphones are popular for recording vocals, acoustic guitars, piano, and other detailed sound sources.
They are generally sensitive and capable of capturing subtle details in a performance.
Many studio condenser microphones require 48V phantom power, which is commonly available on audio interfaces.
Dynamic microphones
Dynamic microphones are generally more rugged and can be useful for vocals, guitar amplifiers, drums, and live recording.
They are often less sensitive to quiet background sounds than many condenser microphones, although the recording environment and microphone design matter.
When shopping for a microphone, consider your recording needs rather than simply purchasing the most expensive model.
A microphone that works well for one singer may not produce the same results for another person’s voice.
It is also worth purchasing a microphone stand, shock mount where appropriate, and a pop filter to improve recording convenience.
5. Studio Headphones: Hearing Every Detail
Studio headphones are essential for monitoring recordings and listening carefully while producing music.
Unlike many consumer headphones, studio headphones are designed to provide a relatively accurate representation of recorded audio.
This helps musicians identify unwanted noises, balance instruments, and make better mixing decisions.
There are two common types:
Closed-back headphones: These are ideal for recording vocals and instruments because they reduce sound leakage into the microphone.
Open-back headphones: These often provide a more spacious listening experience and can be useful for detailed mixing in a quiet environment.
Popular studio headphone models include products from Audio-Technica, Beyerdynamic, Sennheiser, Sony, and AKG.
For beginners, a comfortable pair of closed-back headphones is a sensible first purchase.
Avoid turning your headphone volume too high. Long listening sessions at excessive volumes can damage your hearing.
6. Studio Monitors: Listening to Your Music Accurately
Studio monitors are specialized speakers designed for music production and audio mixing.
They help musicians hear the balance, detail, and frequency characteristics of their recordings.
Unlike many consumer speakers, studio monitors aim for a relatively neutral sound rather than emphasizing bass or treble.
This is important because you want your music to sound good on different playback systems, including:
● Car speakers.
● Smartphones.
● Headphones.
● Home stereo systems.
● Professional sound systems.
Popular studio monitor brands include Yamaha, KRK, JBL, Kali Audio, and Adam Audio.
For a small home recording room, compact nearfield monitors are often a practical choice.
However, purchasing expensive speakers will not automatically produce better mixes. Speaker placement, room acoustics, and listening experience are equally important.
If your budget is limited, begin with quality headphones and add studio monitors when you are ready.
7. Acoustic Treatment: Improving Your Recording Environment
One of the most overlooked parts of building a home recording studio is acoustic treatment.
Even if you purchase expensive microphones and speakers, a poorly treated room can negatively affect your recordings and mixing decisions.
Room reflections, echoes, standing waves, and background noise can make it difficult to capture and evaluate sound accurately.
Acoustic treatment helps control sound reflections inside your room.
Common acoustic treatment products include:
Acoustic panels: These absorb certain sound reflections and can help improve the clarity of your recording space.
Bass traps: These are designed to help manage low-frequency buildup, especially in room corners.
Diffusers: These scatter sound reflections to create a more controlled listening environment.
Thick curtains and rugs: These can help reduce some high-frequency reflections, depending on the room.
It is important to understand that acoustic treatment and soundproofing are different.
Acoustic treatment improves sound inside the room. Soundproofing reduces the amount of sound entering or leaving the room and generally requires more substantial construction.
For beginners, start by selecting a quiet room, positioning your equipment carefully, and addressing problematic reflections.
Avoid assuming that covering every wall with inexpensive foam will create a professional recording environment.
8. MIDI Keyboard Controller: Creating Music With Virtual Instruments
A MIDI keyboard controller is a useful addition to a home recording studio, especially if you produce electronic music, hip-hop, pop, or instrumental compositions.
MIDI stands for Musical Instrument Digital Interface.
A MIDI controller sends performance information to your computer rather than recording the actual sound of the instrument.
This allows you to control virtual pianos, synthesizers, drum machines, orchestral instruments, and other software instruments.
Popular MIDI controller brands include Arturia, Novation, Akai Professional, and Native Instruments.
Some controllers include:
● Piano-style keys.
● Drum pads.
● Knobs and sliders.
● Transport controls.
● Pitch and modulation wheels.
You do not need to be an experienced piano player to benefit from a MIDI keyboard.
Even a small 25-key controller can help you create melodies, experiment with chords, and develop musical arrangements.
9. Cables, Microphone Stands, and Studio Accessories
A home recording studio requires more than computers and expensive audio equipment.
You also need the right accessories to connect everything and maintain an organized workspace.
Some essential accessories include:
● XLR microphone cables.
● Instrument cables.
● Microphone stands.
● Pop filters.
● Headphone adapters.
● USB cables.
● External storage drives.
● Cable organizers.
● Power protection equipment.
Always purchase cables that are appropriate for your equipment.
A sturdy microphone stand is particularly important because it keeps your microphone positioned consistently during recording.
Keeping your workspace organized can also make recording sessions more enjoyable and productive.
10. Backup Storage and Protecting Your Music Projects
Your recordings represent time, creativity, and hard work. Losing them because of a computer failure can be devastating.
That is why backup storage should be part of every home recording studio.
Consider using an external SSD or hard drive to store copies of your music projects.
Cloud storage services can provide another layer of protection, although you should consider subscription costs, upload speeds, and privacy.
A practical backup strategy is to maintain:
1. Your active projects on your main computer.
2. A separate backup on an external drive.
3. An additional backup in a secure cloud storage service or another physical location.
Make backups regularly, particularly after completing important recording sessions.
11. How Much Does It Cost to Build a Home Recording Studio?
The cost of a home recording studio depends on the equipment you already own and the quality of the gear you want to purchase.
Here is an illustrative budget for a beginner setup:
|Equipment |Estimated budget|
|————————|—————:|
|Computer |$500–$1,000 |
|Audio interface |$100–$250 |
|Microphone |$75–$200 |
|Studio headphones |$50–$150 |
|DAW software |Free–$200 |
|Studio monitors |$200–$400 |
|Cables and accessories |$50–$100 |
|Basic acoustic treatment|$100–$250 |
Estimated total: $1,075–$2,550
These figures are planning estimates, not current retailer quotes. You can spend considerably less if you already own a computer or start with free software and headphones.
You also do not need to purchase everything at once.
Start with the equipment needed to record your first song and gradually expand your studio as your skills and production needs develop.
12. Tips for Getting the Best Results From Your Home Studio
Having the right equipment is only the beginning. Learning how to use it effectively is what makes the biggest difference.
Here are a few practical tips:
Start with a quiet recording space. Reduce background noise from fans, air conditioners, televisions, and nearby traffic whenever possible.
Learn microphone placement. Small changes in microphone position can dramatically affect the sound of a vocal or instrument.
Keep recording levels under control. Avoid recording signals that clip or distort unintentionally.
Learn your DAW. Understanding recording, editing, routing, and mixing will help you work more efficiently.
Use reference tracks. Listen to professionally produced music in a similar genre to understand how your mixes compare.
Do not purchase unnecessary plugins. Many DAWs include excellent built-in effects and instruments. Learn to use them before spending money on additional software.
Practice regularly. Recording and mixing are skills that improve with experience.
Conclusion: Build Your Studio and Start Creating Music
Building a home recording studio is an exciting step for any independent musician.
With the right combination of computer hardware, recording software, microphones, an audio interface, headphones, studio monitors, and acoustic treatment, you can create an environment that supports your musical creativity.
The most important thing to remember is that you do not need an expensive professional studio to begin making music.
Start with the essentials, learn your equipment, experiment with different recording techniques, and gradually upgrade your setup as your needs change.
A home recording studio gives you creative freedom, independence, and the opportunity to develop your own sound.
Whether you want to record your first song, produce beats, create demos, or release a full-length album, the tools to get started are more accessible than ever.
Your next great song could begin right in your own home.


Leave a Reply